Your First Table
Available to: Developers, Admins Minimum plan: Free
This tutorial walks you through the complete workflow of creating a reference data table in TitanRDM — from defining a domain, through to entering data. By the end, you will have a working table that your team can view and edit.
Prerequisites
- A TitanRDM account that has been activated
- You are signed in as a user with a Developer licence
- You are on the correct branch (typically Development, where day-to-day changes are made)
Tip: Your current branch is shown in the top-right corner of the dashboard and in the header bar. To switch branches, click the branch name and select a different one.
Step 1: Create a Domain
Domains organise your tables into subject areas and control who can access them. You need at least one domain before you can create a table.
- In the sidebar, expand Admin and click Domains
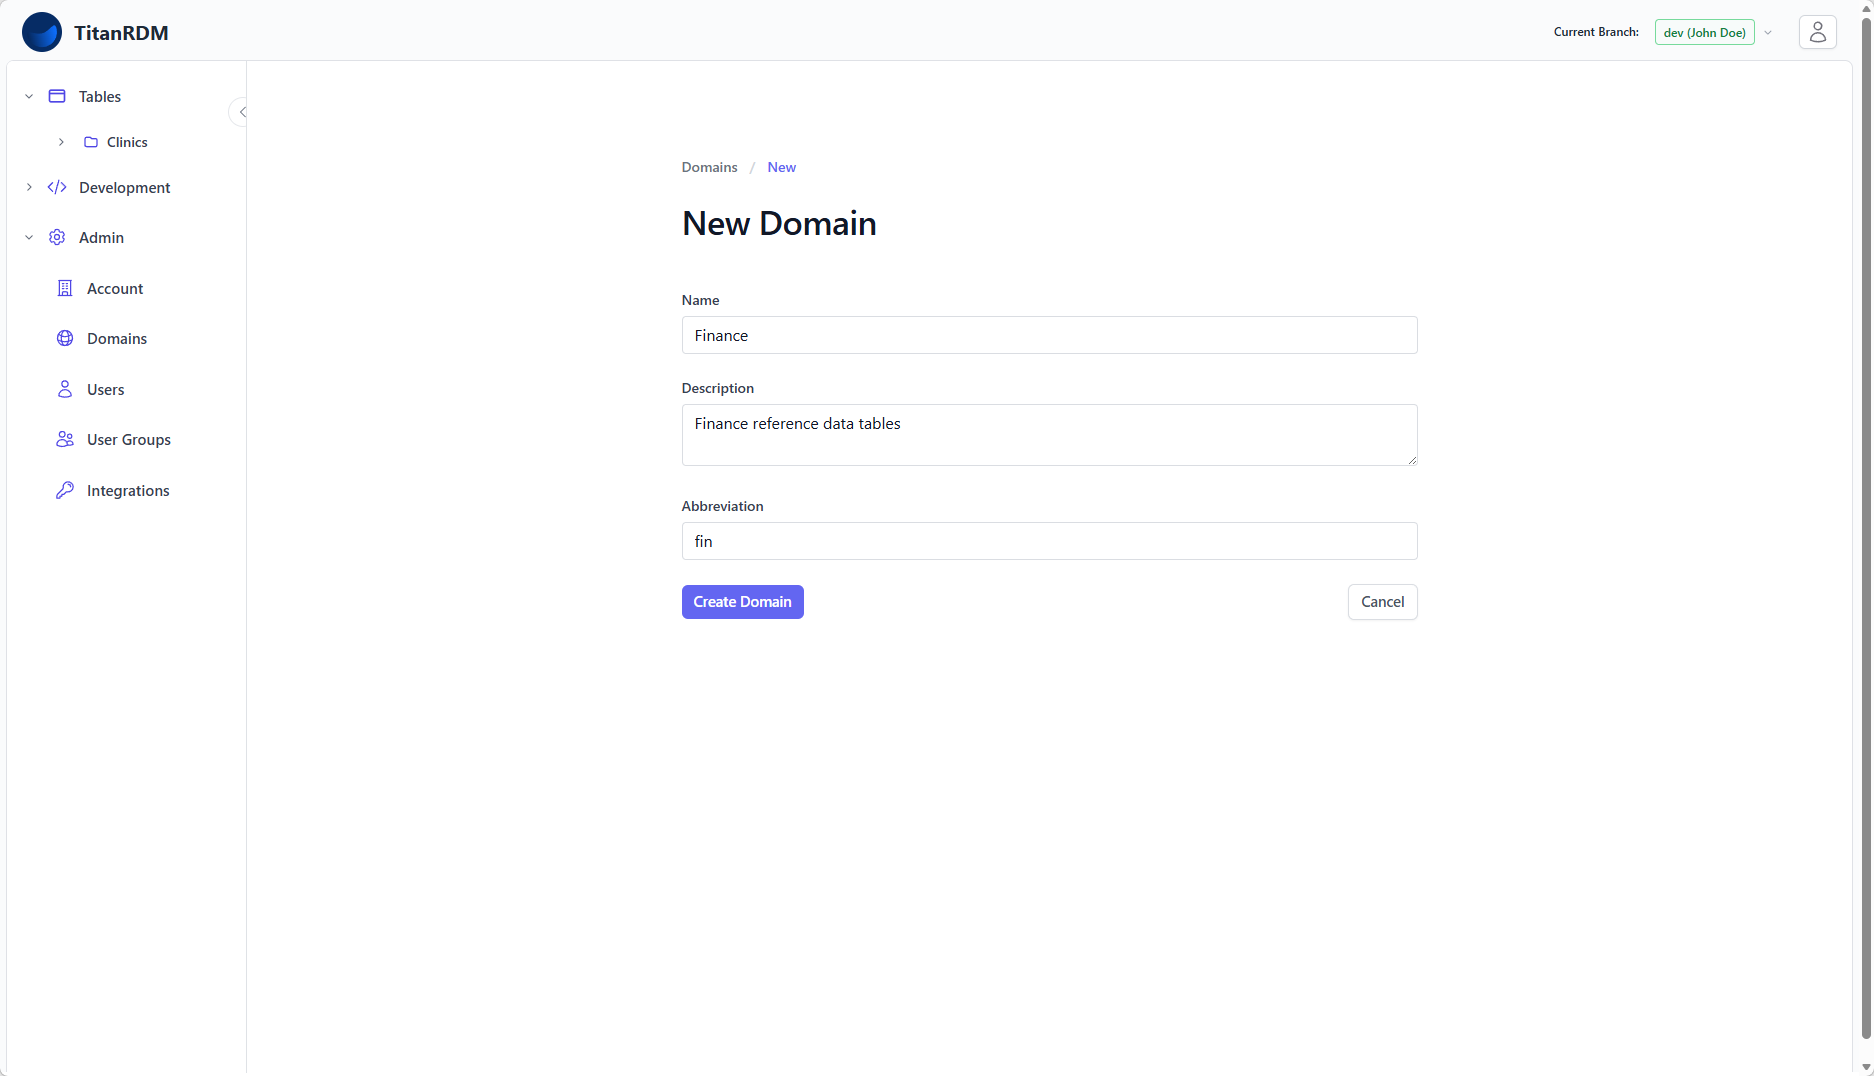
- Click New Domain
- Fill in the form:
- Name — a descriptive name, e.g.,
Finance - Description — optional, e.g.,
Finance reference data tables - Abbreviation — a short code (max 4 characters), e.g.,
fin. This is used as a prefix to the physical database table name.
- Name — a descriptive name, e.g.,
- Click Create Domain
TitanRDM automatically creates default user groups and permissions for the new domain, so developers on your account can immediately start creating tables within it.
Step 2: Create a Table Definition
A table definition describes the structure of your reference data table — think of it as the schema.
- In the sidebar, expand Development and click Table Definitions
- Click New Table Definition
- Fill in the form:
- Branch — pre-filled with your current branch (read-only)
- Domain — select the domain you just created (e.g.,
Finance) - Table definition name — e.g.,
Currency Codes - Database table name — auto-generated from the name, e.g.,
currency_codes. You can customise this if needed. - Description — optional, e.g.,
ISO 4217 currency codes and names - Allow new rows to be added manually — check this box if users should be able to add rows through the UI. Leave unchecked if data will come from only file uploads or source system API/SDK syncs.
- Click Create Table Definition
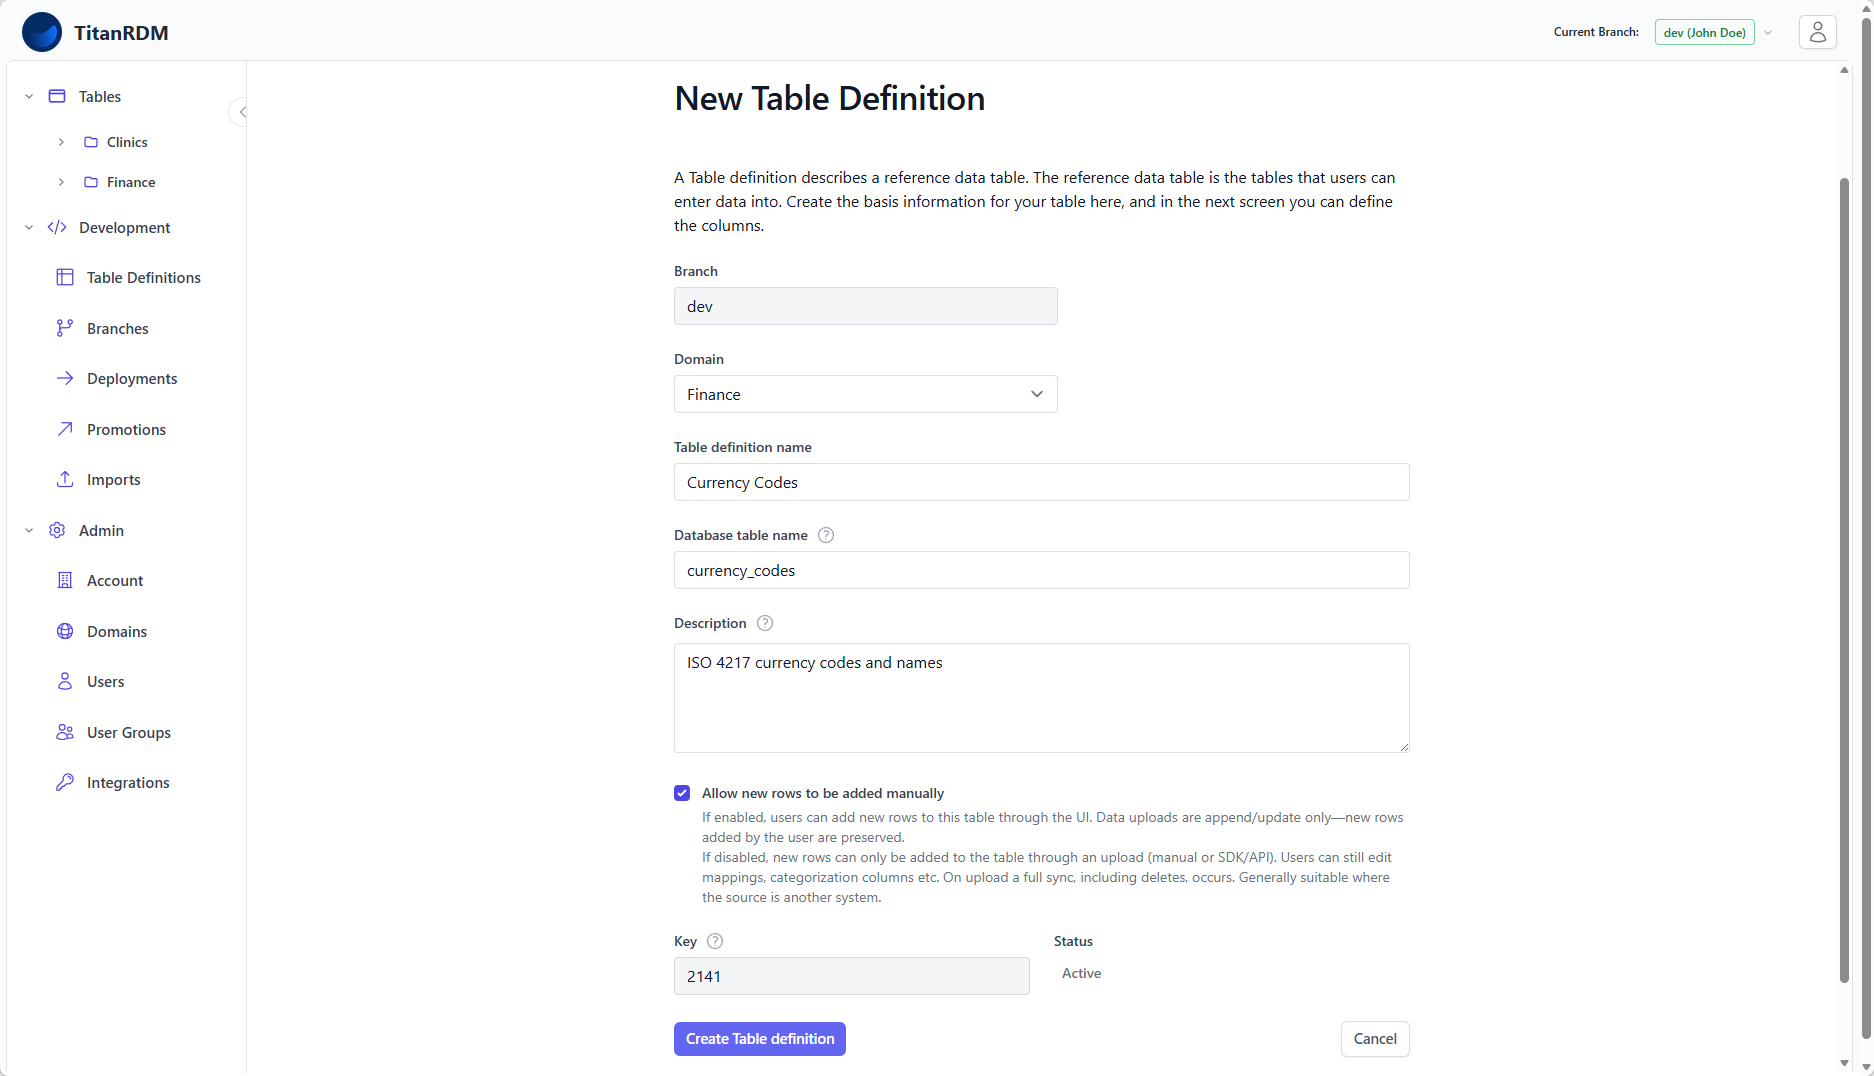
Note: The Key field is a system-generated identifier that is maintained across branches. You do not need to set this.
Step 3: Add Column Definitions
After creating the table definition, you are taken to the Edit Columns page where you define the columns for your table.
Using the Column Grid
The column editor uses an interactive grid where you can add, edit, and reorder columns.
Tip: You can alternatively import the schema from a CSV file using the Import Schema button to make this process faster.
- The top row of the grid is reserved for adding a new column.
- Fill in the column properties:
| Property | Description | Example |
| Name | Column name. Must start with a letter or underscore. | currency_code |
| Data Type | The data type for the column. | varchar |
| Length | Maximum length (for varchar) or precision (for decimal). | 3 |
| Scale | Decimal places (for decimal types only). | — |
| Primary Key | Check if this column uniquely identifies a row. | Yes |
| Required | Check if this column must always have a value. | This is automatically ticked and disabled for primary key columns |
| Description | Optional description shown to users. | scroll across and enter ISO 4217 three-letter code |
| Valid Values | Comma-separated list of allowed values (optional). | — |
Click the + button to add the new row
Add more columns as needed. For this tutorial, create:
| Name | Data Type | Length | PK | Required |
currency_code | varchar | 3 | Yes | Yes |
currency_name | varchar | 100 | No | Yes |
numeric_code | varchar | 3 | No | No |
minor_units | integer | — | No | No |
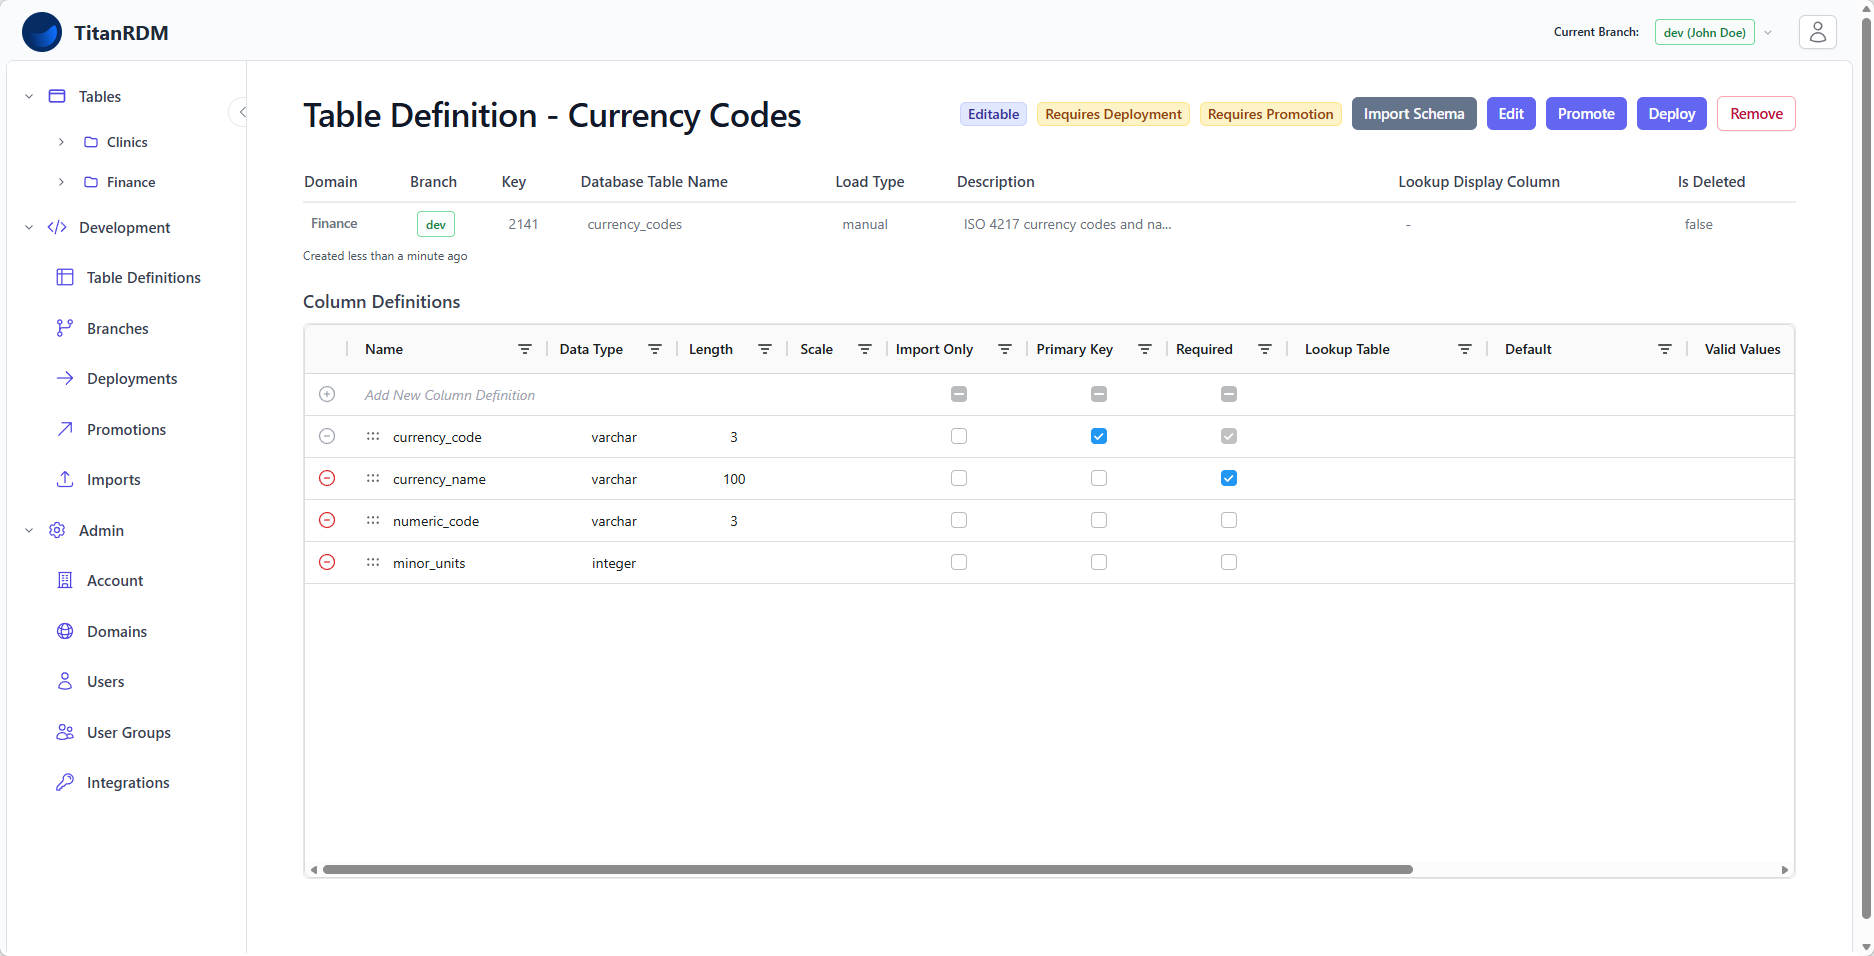
Tip: You can reorder columns by dragging them, using the "6 dot" drag handle on the left.
Supported Data Types
TitanRDM supports a wide range of data types:
- Text:
varchar,character,text - Numeric:
integer,smallint,bigint,decimal,real,double - Boolean:
boolean - Date/Time:
date,time,timetz,timestamp,timestamptz - Binary:
binary
Step 4: Deploy the Table
Creating a table definition only defines the metadata — it does not create the physical database table. To make the table available for data entry, you need to deploy it.
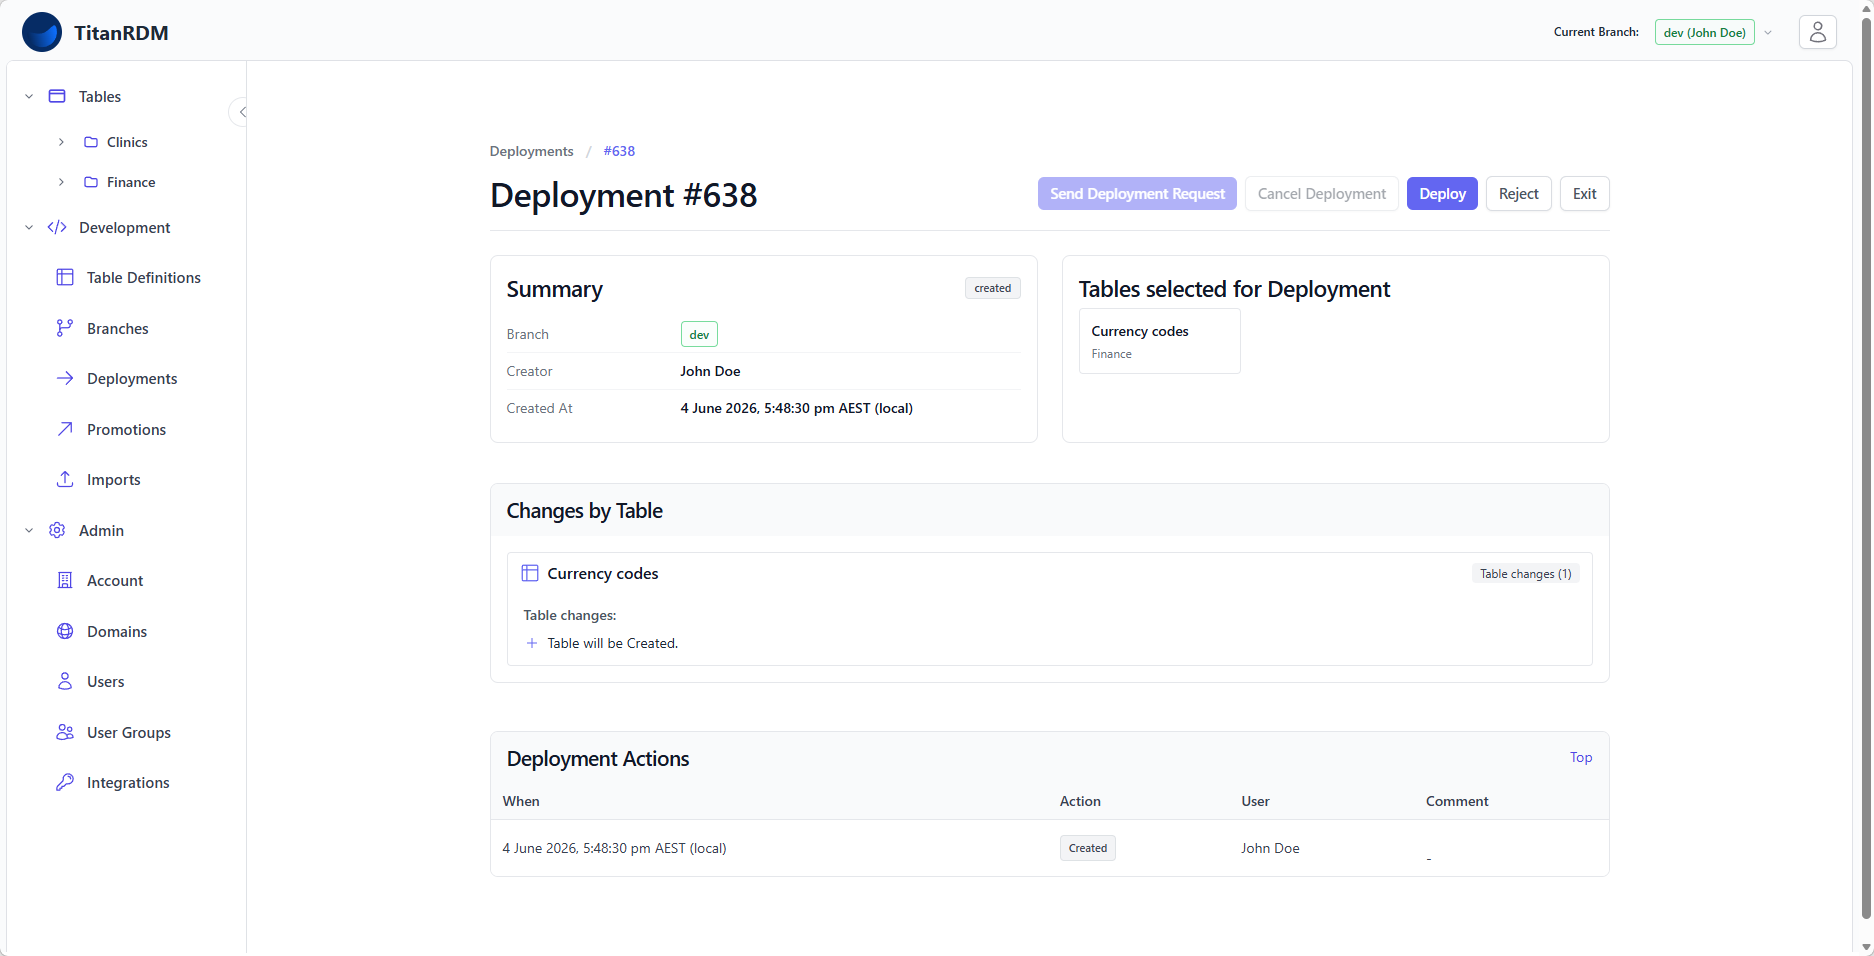
- In the top menu bar, click Deploy
- You will see a list of table definitions that have changes requiring deployment. The "Currency Code" table will be ticked by default. You can choose to deploy all or select specific tables.
- Click the Create Deployment button
- The Deployment table appears, showing you what tables will be deployed, including the changes that will be made to each table in the deployment. In this case only a single table is being deployed, and since this is a new table, the changes will be the creation of the table.
- Review the changes — TitanRDM shows exactly what will be created (new table, columns, constraints)
- Click Deploy
TitanRDM will:
- Create the physical database table with the columns you defined
- Add system columns (trdm_sk as the surrogate key, plus audit columns for created/updated timestamps and user tracking)
- Mark the table definition as deployed
Note: On all plans you deploy to your working branch (e.g., Development) and later promote the change up to Test and then Production. Every account includes the full Development → Test → Production workflow.
Step 5: View and Enter Data
Now that your table is deployed, you can view it and start entering data.
- In the sidebar, expand Tables — you should see the Finance domain listed, and within it, your new table
- Click the table name (e.g.,
Currency Codes)
You are now in the data grid — an interactive spreadsheet-like interface.
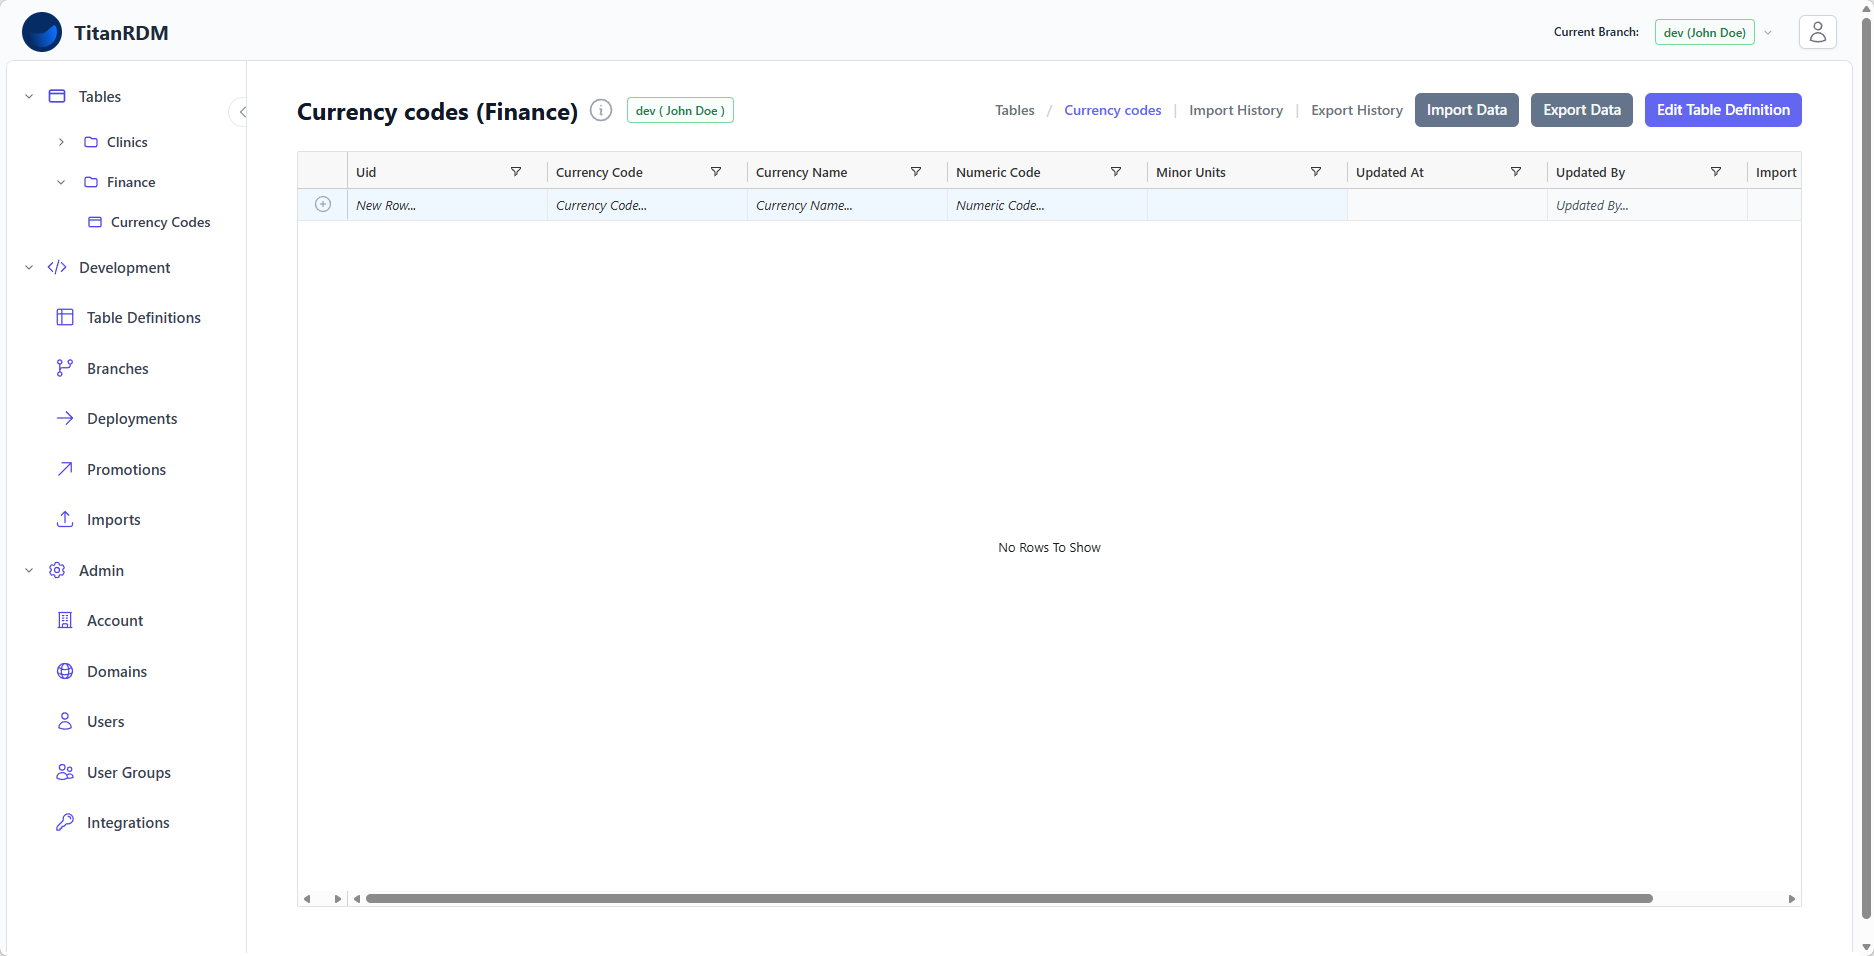
Adding Records
If you enabled Allow new rows to be added manually on the table definition:
- The top row of the grid is a special row for adding new records
- Fill in the values for each column directly in the top row cells. The UID is a reserved system-generated surrogate primary key.
- Click the + button to save your changes
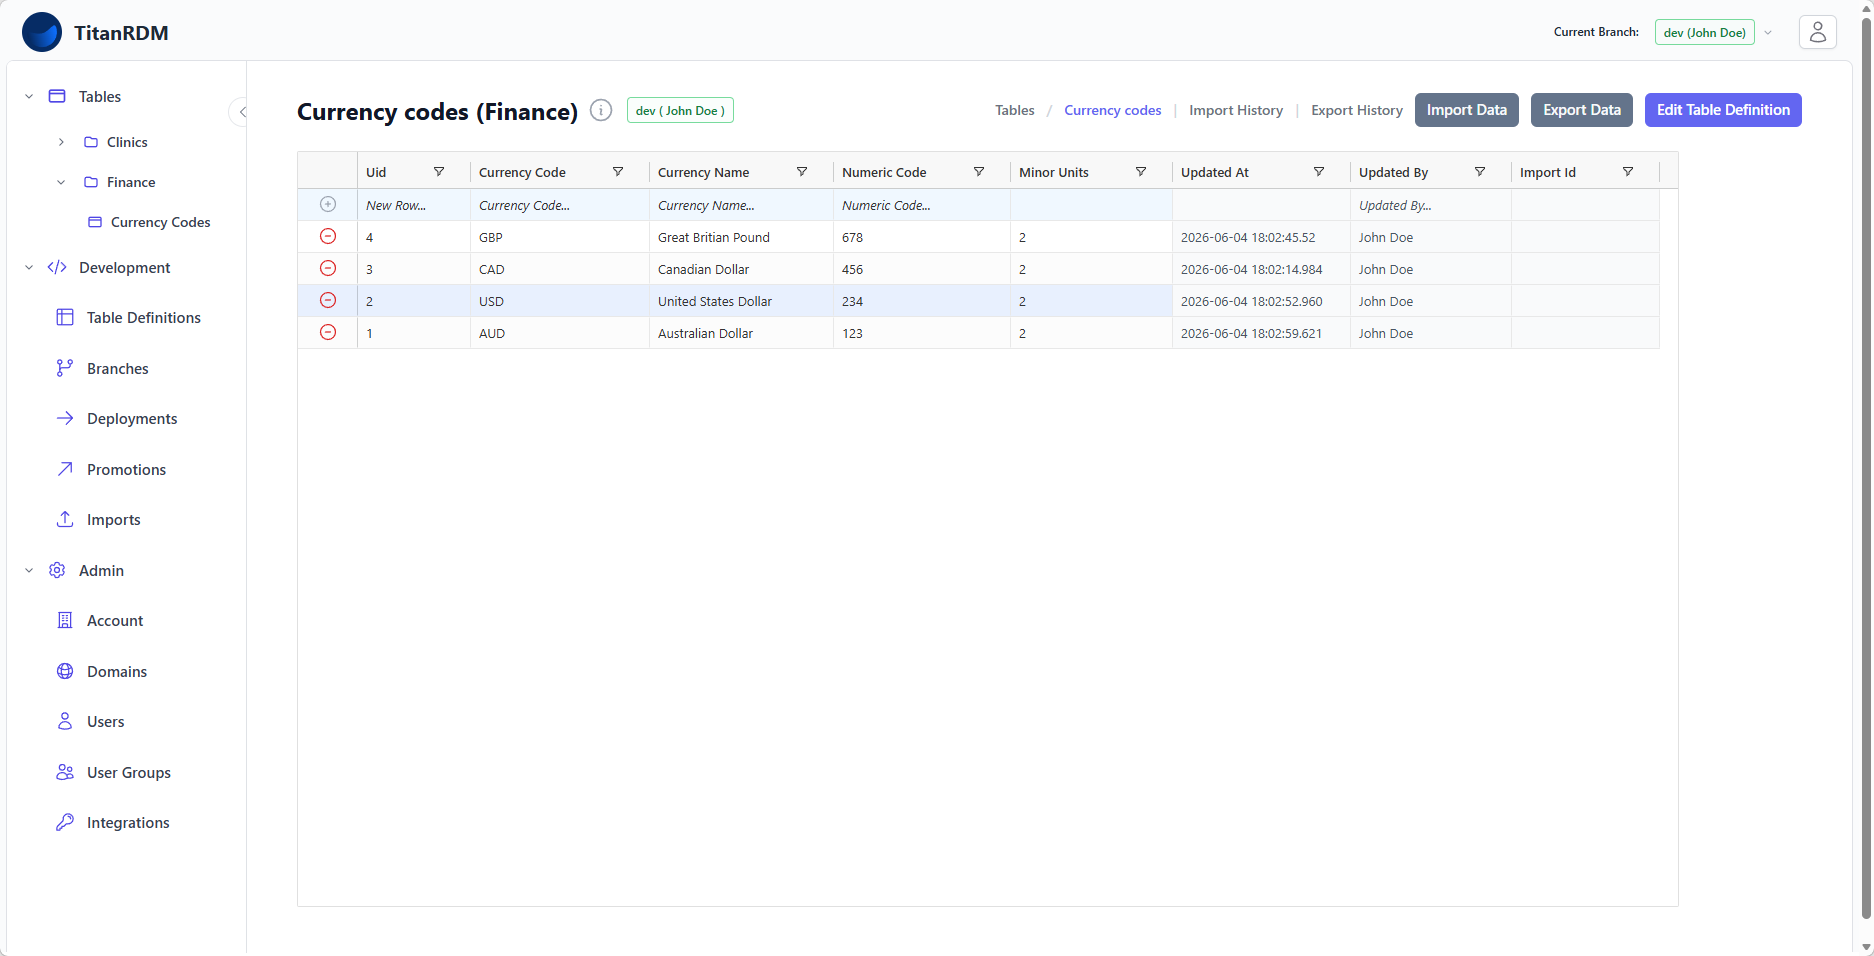
Editing Records
- Click any cell to edit it inline
- Changes are saved automatically when you move to another cell
- For columns with valid values defined, a dropdown appears with the allowed options
- For foreign key columns, a lookup dropdown shows values from the referenced table
Sorting and Filtering
- Click a column header to sort
- Use the column menu (right-click the header) to filter by value
- The grid supports multi-column sorting
What You Have Built
Congratulations! You have completed the core TitanRDM workflow:
- Domain — organised your table into a subject area
- Table Definition — described the structure of your reference data
- Column Definitions — specified the columns, data types, and constraints
- Deployment — created the physical database table
- Data Entry — added and edited reference data through the grid
This is the foundation for everything else in TitanRDM. From here you can:
- Create Tables by importing the schema (CSV, Excel, JSON, Parquet)
- Import data from files (CSV, Excel, JSON, Parquet)
- Export data to CSV
- Set up foreign key relationships between tables
- Promote changes through Test to Production
- Use the REST API for programmatic access
What's Next
- Understand the key concepts — domains, branches, deployments, promotions