Creating Tables
Available to: Developers, Admins Minimum plan: Free
This guide walks through creating a new table definition and defining its columns. A table definition is the blueprint for a reference data table — once created and deployed, it becomes a physical table where users can enter and manage data.
Prerequisites
- Developer permission on the target domain (via the "Domain [Name] Developer" user group), or Account Administrator access
- Developer permission on the current branch (via the "Branch [Name] Developer" user group)
- At least one domain must exist in your account
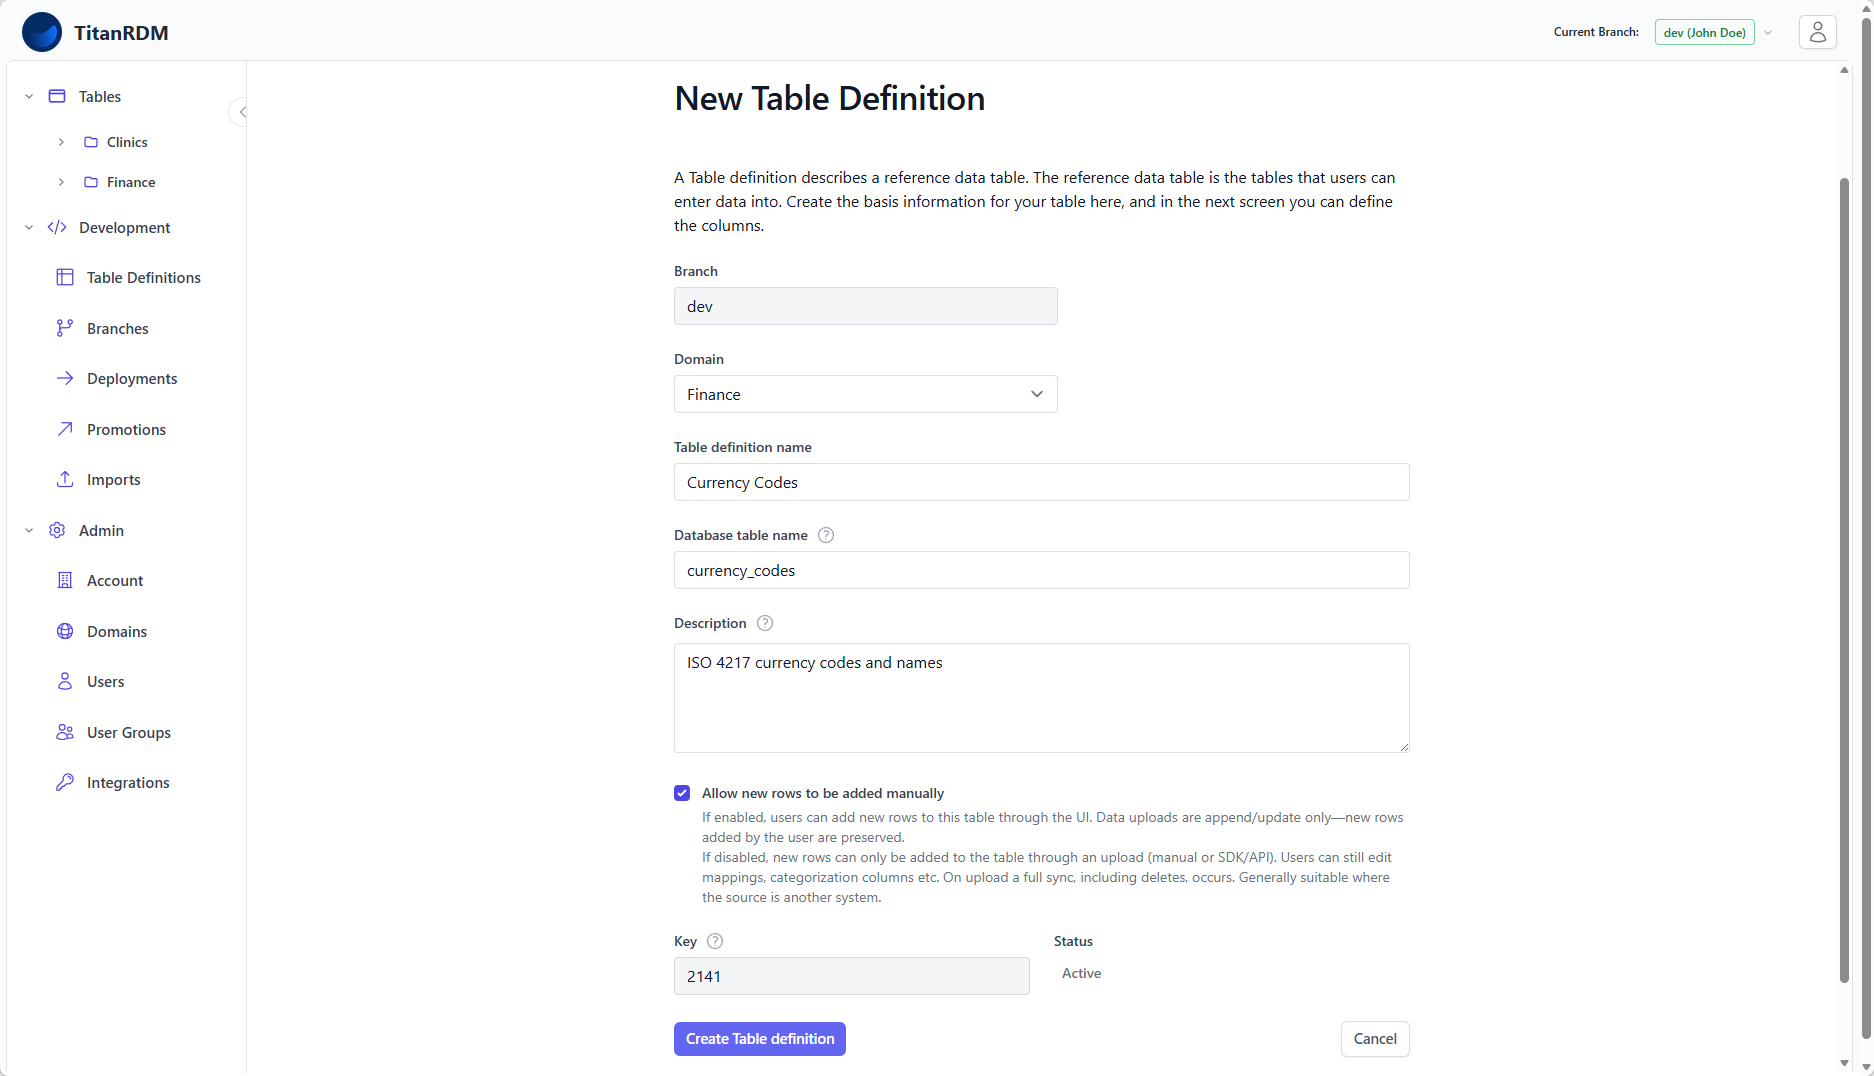
Step 1: Create the Table Definition
- Navigate to Development > Table Definitions
- Click New Table Definition
- Fill in the form:
| Field | Required | Description |
| Branch | Yes | Pre-filled with your current branch (read-only). Switch branches first if needed. |
| Domain | Yes | Select the domain this table belongs to. Only domains you have permission on are listed. |
| Name | Yes | A descriptive name (e.g., Currency Codes). Must start with a letter or underscore. Must be unique within the branch and domain. |
| Database Table Name | No | The physical name used in the database. Auto-generated from the name (lowercased, spaces replaced with underscores). Can be customised but must not contain spaces. |
| Description | No | Free-text context. Shown as a tooltip on the data grid page — useful for instructions to data entry users. |
| Allow new rows to be added manually | No | Check this box if users should be able to add rows through the UI. Leave unchecked if data will only come from file uploads. |
- Click Create Table Definition
You are redirected to the Edit Columns page to define the table's structure.
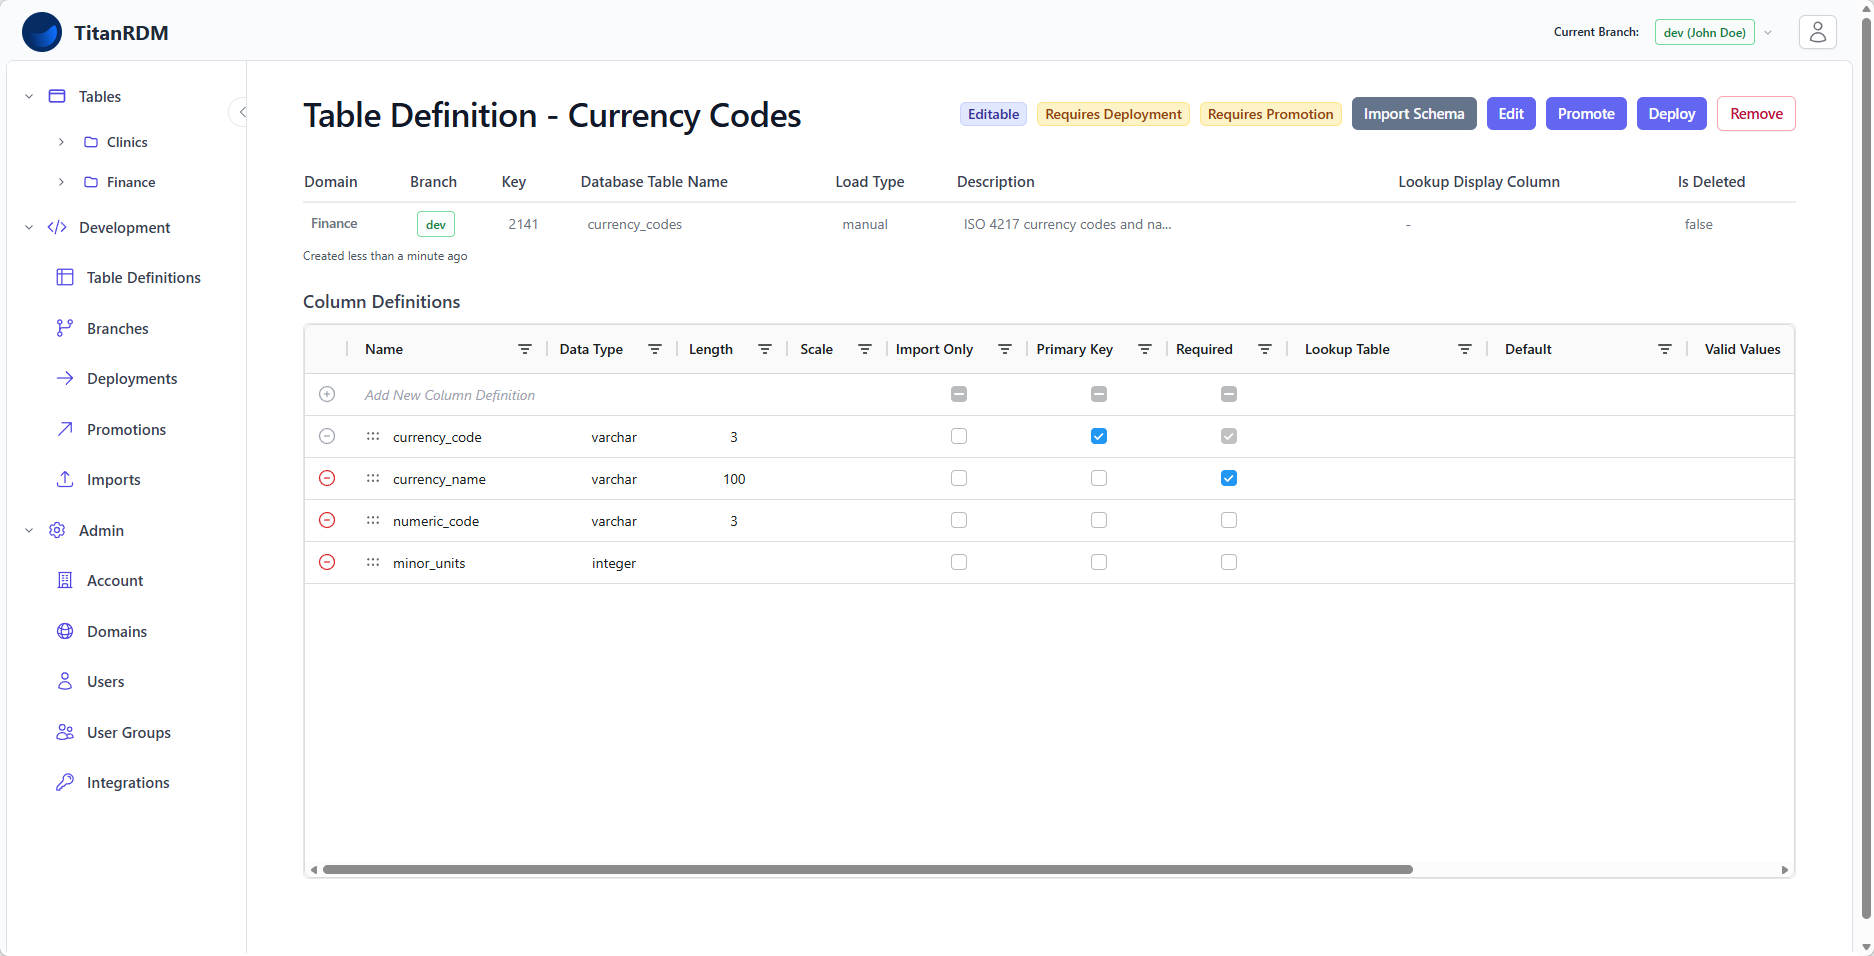
Step 2: Define Columns
The Edit Columns page uses an interactive AG Grid editor where you define each column.
Adding a Column
- Click Add Column (or press the add button in the grid toolbar)
- A new row appears in the grid
- Fill in the column properties:
| Property | Required | Description |
| Name | Yes | Column name. Must start with a letter or underscore. Must be unique within the table. |
| Data Type | Yes | Select from the dropdown. See Column Types Reference for all options. |
| Length | No | Maximum length for text types, precision for numeric types, or fractional-second precision (0–6) for date/time types. |
| Scale | No | Decimal places for decimal type. |
| Primary Key | No | Check to make this column part of the table's primary key. Primary keys are required for Import/Export operations. |
| Required | No | Check to make this column non-nullable. |
| Foreign Key | No | Select a referenced table to enable lookup dropdowns. See Foreign Keys. |
| Valid Values | No | Comma-separated list of allowed values. Enforces a dropdown in the data grid. |
| Description | No | Tooltip shown in the data grid column header. |
Reordering Columns
Drag a row in the grid to change its display order. The display order controls the left-to-right arrangement of columns in the data grid.
Editing a Column
Click any cell in the column definitions grid to edit it. Changes are saved automatically.
Removing a Column
Select a column row and click Delete (or use the row action menu). The column is marked as deleted. If the table has already been deployed, the column will be dropped from the physical table on the next deployment.
Note: Removing a column from a deployed table will permanently delete the data in that column when you deploy. Review carefully before deploying.
Step 3: Set the Lookup Display Column (Optional)
If other tables will reference this table via foreign keys, you should set a Lookup Display Column:
- Navigate back to the table definition's Edit page
- In the Lookup Display Column dropdown, select the column whose values should appear in foreign key lookup dropdowns
- Save
For example, for a Currency Codes table with columns currency_code and currency_name, you might set the lookup display column to currency_name so that users see "US Dollar" in the dropdown rather than just "USD".
Step 4: Deploy
After creating the table definition and columns, the table needs to be deployed to create the physical database table:
- Navigate to Development > Deployments
- Click New Deployment
- Your new table appears in the list of changes requiring deployment
- Review the diff (all columns will show as "New")
- Click Deploy
Once deployed, the table appears in the sidebar under its domain, and users can begin entering data.
Tip: You can create multiple table definitions before deploying. A single deployment can include all your new tables at once.
After Creation
Once a table is created and deployed:
- It appears in the Tables sidebar under its domain
- Users with Data Manager permission on the domain can view and edit data
- You can continue to modify the table definition (add/remove/change columns) and redeploy
- The table definition shows a "Needs Deploy" badge when it has undeployed changes
Naming Conventions
TitanRDM applies these conventions automatically:
- The database table name is generated from the table name by lowercasing and replacing spaces with underscores
- The domain abbreviation is used as a prefix in the physical schema (e.g.,
fin.currency_codesfor a table in the Finance domain with abbreviationfin) - Column names follow the same pattern — what you type is used as-is, so use a consistent convention (e.g.,
snake_case)
Related Pages
- Column Types Reference — all supported data types
- Foreign Keys — setting up relationships between tables
- Import Schema — auto-generating columns from a file
- Table Definitions — conceptual overview
- Deployments — applying your changes to the database
- Your First Table — beginner tutorial