Signing Up
This guide walks you through creating a TitanRDM account, from registration to a fully activated workspace ready for use.
Note: TitanRdm uses passwordless authentication. You will receive a magic link to sign in.
Step 1: Register
Navigate to the TitanRDM sign-up page https://app.titanrdm.com/users/sign_up. You will be asked to provide:
- Organisation name — the name of your company or team
- First name and Last name
- Email address — this becomes your login identity
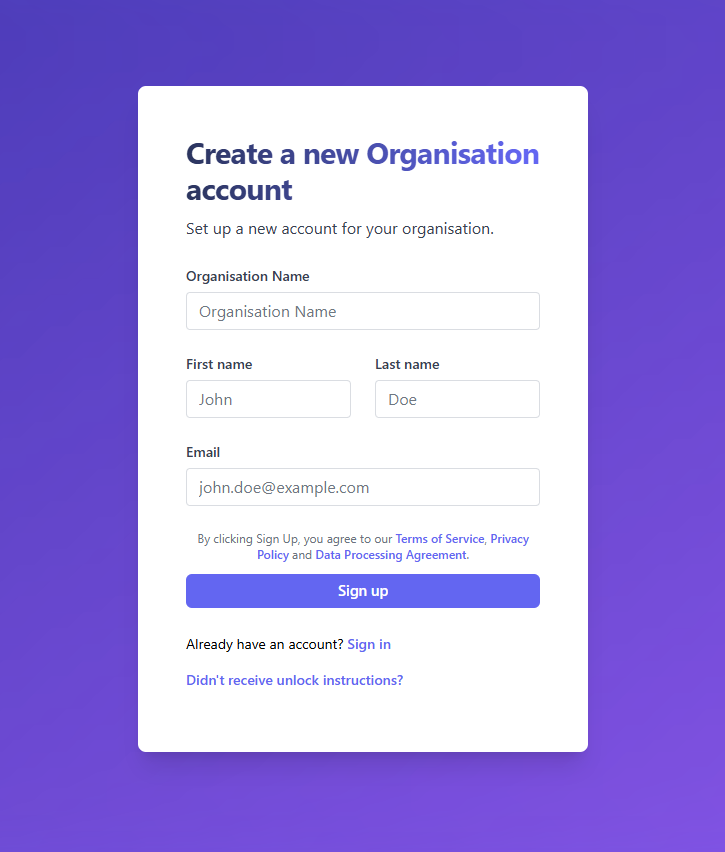
Click Sign up to create your account.
At this point, your account has been created but not yet activated.
Tip: The person who creates the account automatically becomes the Account Administrator and is assigned a Developer licence.
Step 2: Check Your Email
After signing up, TitanRDM will redirect you to a confirmation page showing:
- Organisation — the name you registered
- URL — your new account URL (e.g.
your-subdomain.app.titanrdm.com)
At the same time, TitanRDM automatically sends a welcome email to the address you registered with. This is a one-off activation email — and contains a Sign In to Activate Your Account link that takes you directly to your new subdomain.
Click the link in the welcome email to sign in for the first time and activate your account. The link expires after a short period, so use it soon.
If the link expires, you can request a fresh sign-in link from the sign-in page on your subdomain (e.g. your-subdomain.app.titanrdm.com/users/sign_in). The confirmation page also has a Request a new sign-in link option if you don't see the welcome email in your inbox (check your spam folder first).
Step 3: Activate Your Account
After signing in for the first time, you will be redirected to the Account Setup page. This is where you configure the core settings for your organisation.
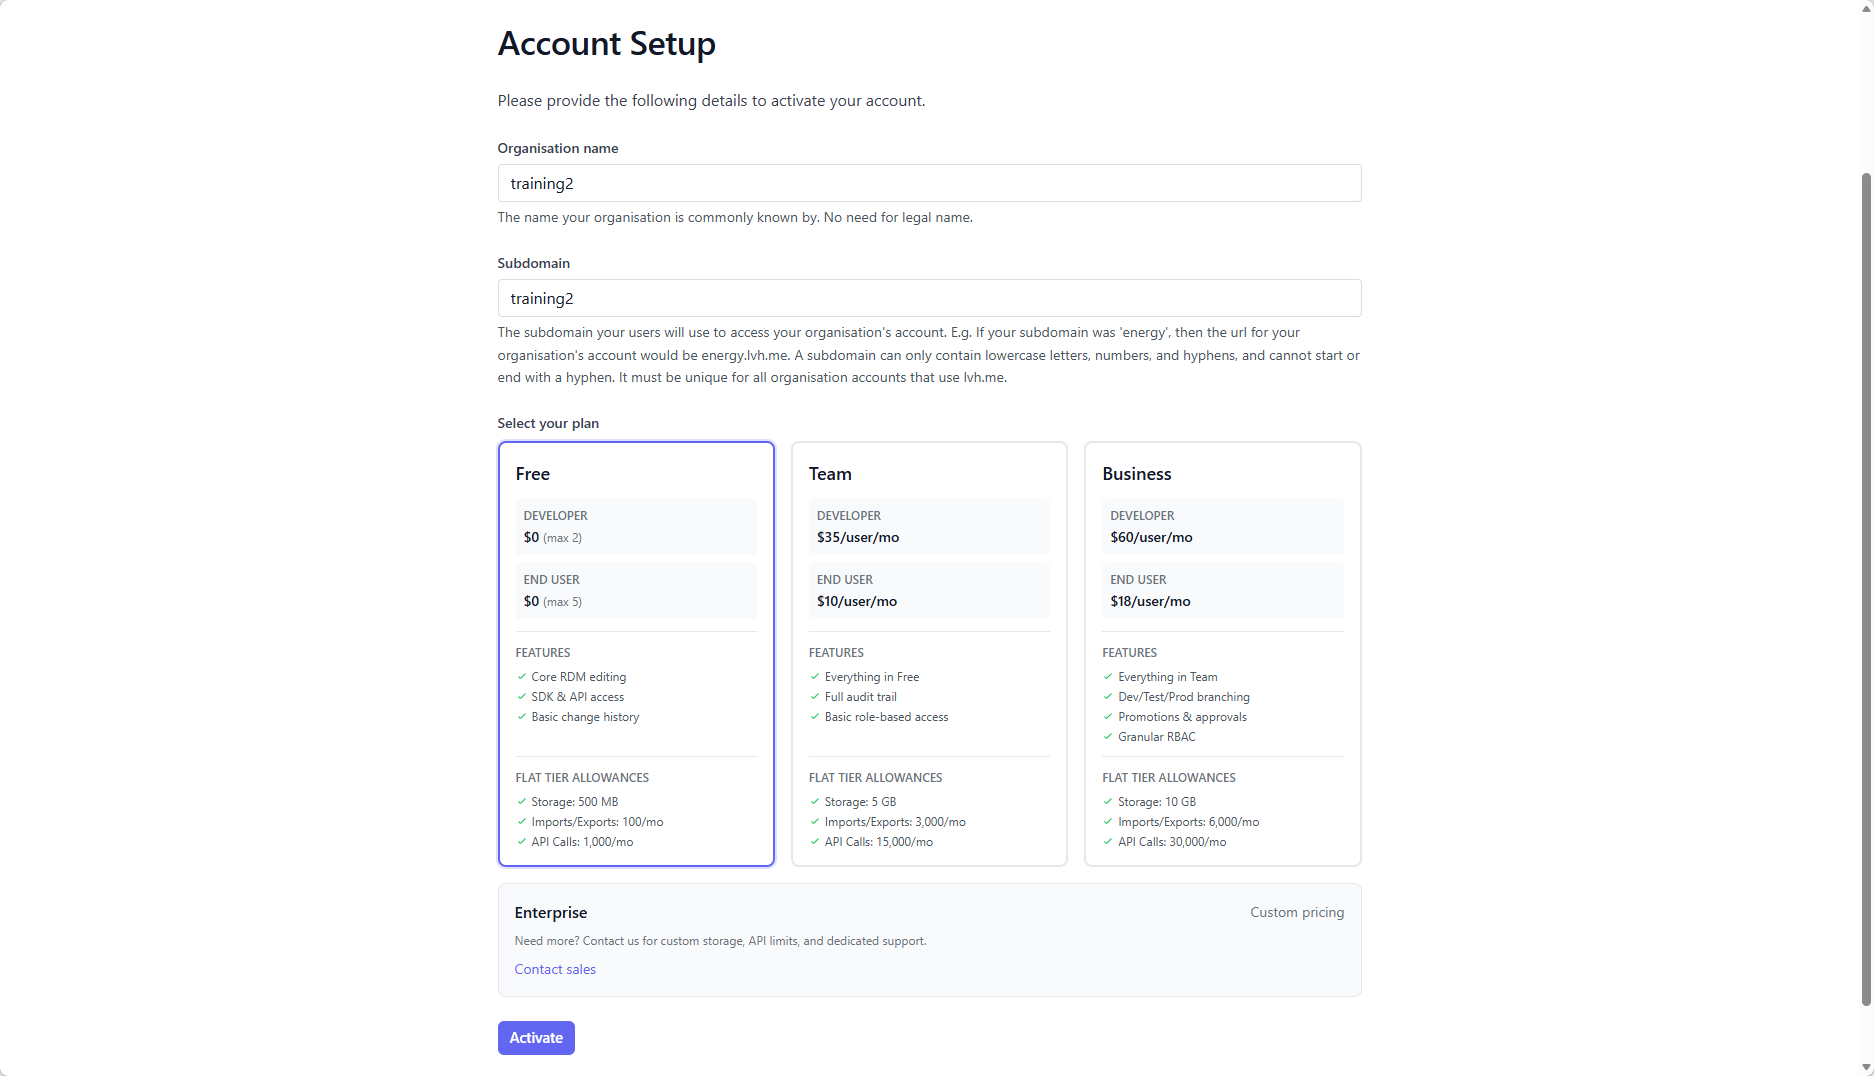
Organisation Name
Enter the name your organisation is commonly known by. This does not need to be a legal name — it is used for display purposes throughout TitanRDM.
Subdomain
Choose a unique subdomain for your account. This determines the URL your team will use to access TitanRDM:
https://your-subdomain.titanrdm.com
Subdomain rules: - Only lowercase letters, numbers, and hyphens - Cannot start or end with a hyphen - Must be unique across all TitanRDM accounts
Note: The subdomain is auto-generated from your organisation name, but you can change it before activating.
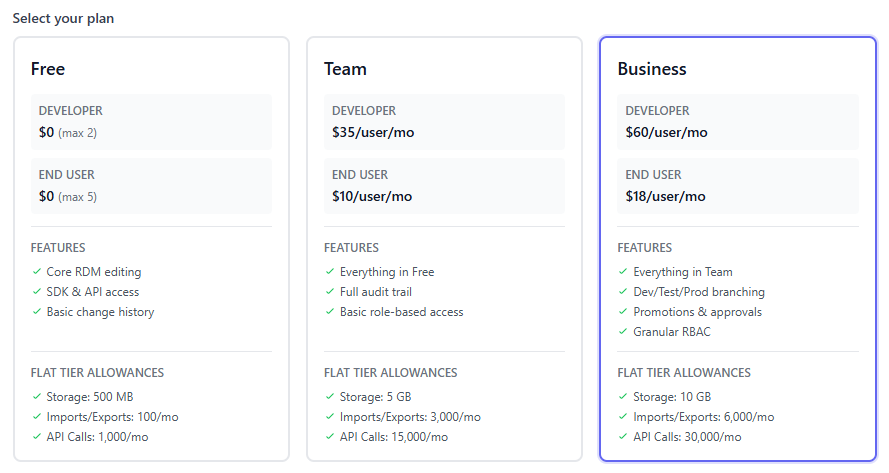
Select Your Plan
Choose the plan that fits your team. You can always change plans later.
Enterprise plans with custom limits and dedicated support are available by contacting sales@titanrdm.com.
Free Plan Activation
If you select the Free plan, click Activate and your account will be provisioned immediately.
Paid Plan Activation
If you select Plus or Business, clicking Activate will redirect you to a secure Stripe checkout page to enter your payment details. After payment is confirmed, your account will be provisioned automatically.
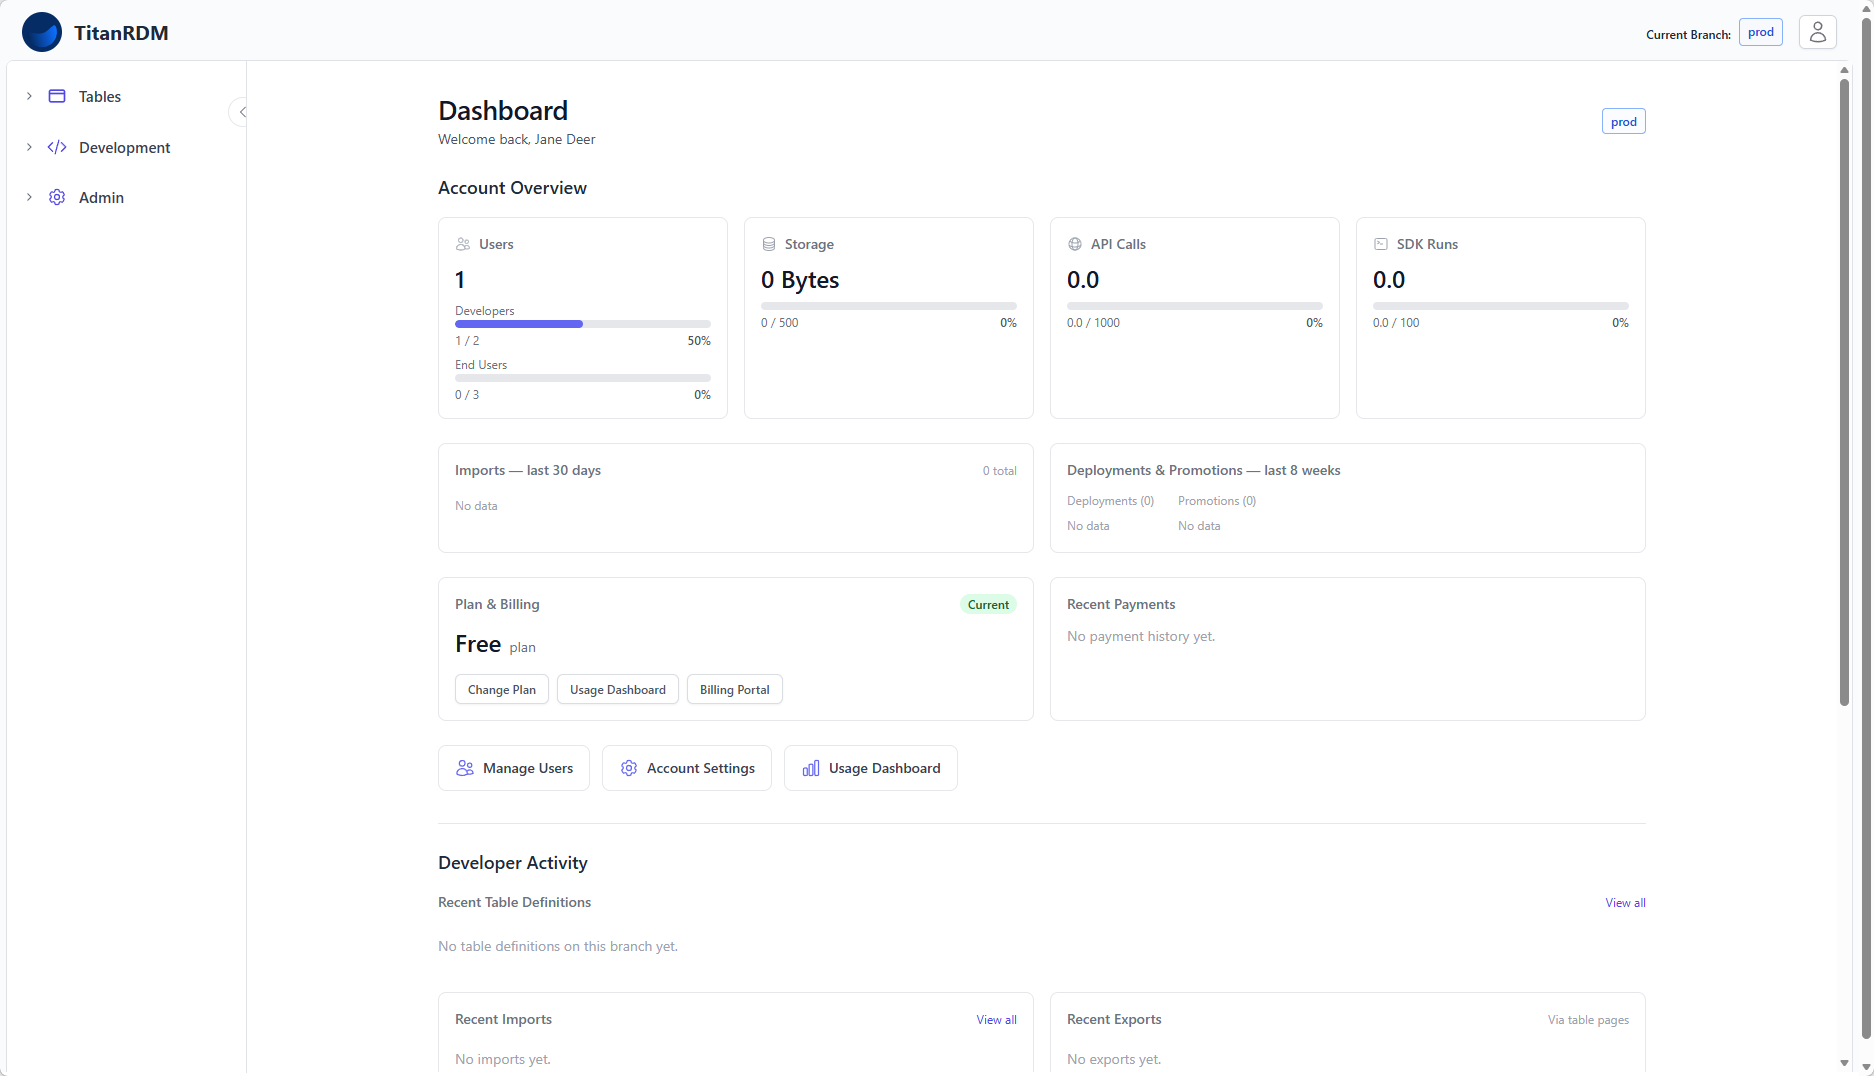
What Happens During Activation
When you click Activate, TitanRDM runs a background job that:
- Creates a dedicated database for your account — your data is completely isolated from other tenants
- Creates permanent branches — the environments your team will work in. On all plans you get three branches — Production, Test, and Development — giving you a full promotion workflow
- Sets up default user groups and permissions — including an Account Administrator group (which you are automatically added to) and an Account Developer group
- Sets your current branch — you are placed on the Development branch
This typically takes a few seconds. Once complete, you are redirected to the TitanRDM dashboard.
Authentication
Magic Link
From the login page, choose Sign in with magic link. TitanRDM will email you a one-time link that signs you in without a password. Magic links expire after a short period.
Organizations using SSO
If your organization is on the Business plan and has enabled Single Sign-On, your sign-in page shows a "Sign in with <your provider>" button instead of the email form, and you sign in through your company identity provider. See Single Sign-On (SSO) for setup details.
Inviting Other Users
After activation, you can invite other users to your account:
- Navigate to Admin > Users in the sidebar
- Click Add User
- Enter the user's details and choose their licence type (Developer or End User)
The invited user will receive an email with instructions to set up their account.
Note: Every plan includes 1 developer and 2 end users. The Free plan is capped at this allocation; paid plans (Plus and Business) let you add unlimited additional users, billed per seat above the included allocation.
What's Next
- Create your first table — a step-by-step tutorial
- Learn how to navigate the UI
- Understand the key concepts